

Harsh scrubbing is not the best way to keep grout looking clean. To learn how to keep grout clean longer, remove loose dirt first, use a gentle cleaner suited to your tile, and wipe away water and cleaning residue. For stubborn grime, an oxygenated cleaner may help if its label says it is suitable for your surface.
It’s frustrating when floor grout looks dirty again soon after mopping. A few careful habits can help limit the dirt and residue that settle into its tiny pores.
Learn how to clean grout between floor tiles, use oxygenated cleaners thoughtfully, and build a simple maintenance routine. You’ll also find out which approaches can wear down grout or leave a film, helping your floors stay fresher with less effort.
Key Takeaways
- Start with a pH-neutral cleaner and avoid acidic or harsh products that can wear down grout or its sealer.
- For stubborn discoloration, choose an oxygenated cleaner suited to your tile and follow its directions carefully.
- Adjust routine care to how much dirt your floors collect: remove loose soil, clean spills promptly, and keep excess water from sitting in grout lines.
- If grout stays dingy despite gentle upkeep, professional tile and grout cleaning can help lift embedded soil.
Avoiding acidic and harsh cleaning products
- Choose a pH-neutral cleaner for routine tile and grout care. Grout’s tiny pores can absorb cleaning products, and leftover residue may attract fresh soil. For regular foot traffic, mist a small area, wipe it with a microfiber mop, then buff it dry. This helps avoid leaving a wet film across grout lines.
- Keep vinegar and lemon juice away from cement-based grout. Their acidity can attack the alkaline cement and gradually wear down the grout surface. Acidic cleaners can also erode some tile finishes. If a stain resists gentle cleaning, don’t switch to stronger acids: repeated abrasion or chemical exposure can remove grout’s top layer and make repairs necessary.
- Skip bleach and ammonia for routine grout cleaning. Harsh chemical cleaners can break down grout and protective sealers, leaving porous lines more exposed to dirt. Avoid oil- or wax-based floor products, too, since they can leave a film that traps grime. Read the label and use only cleaners marked as suitable for your tile and grout.
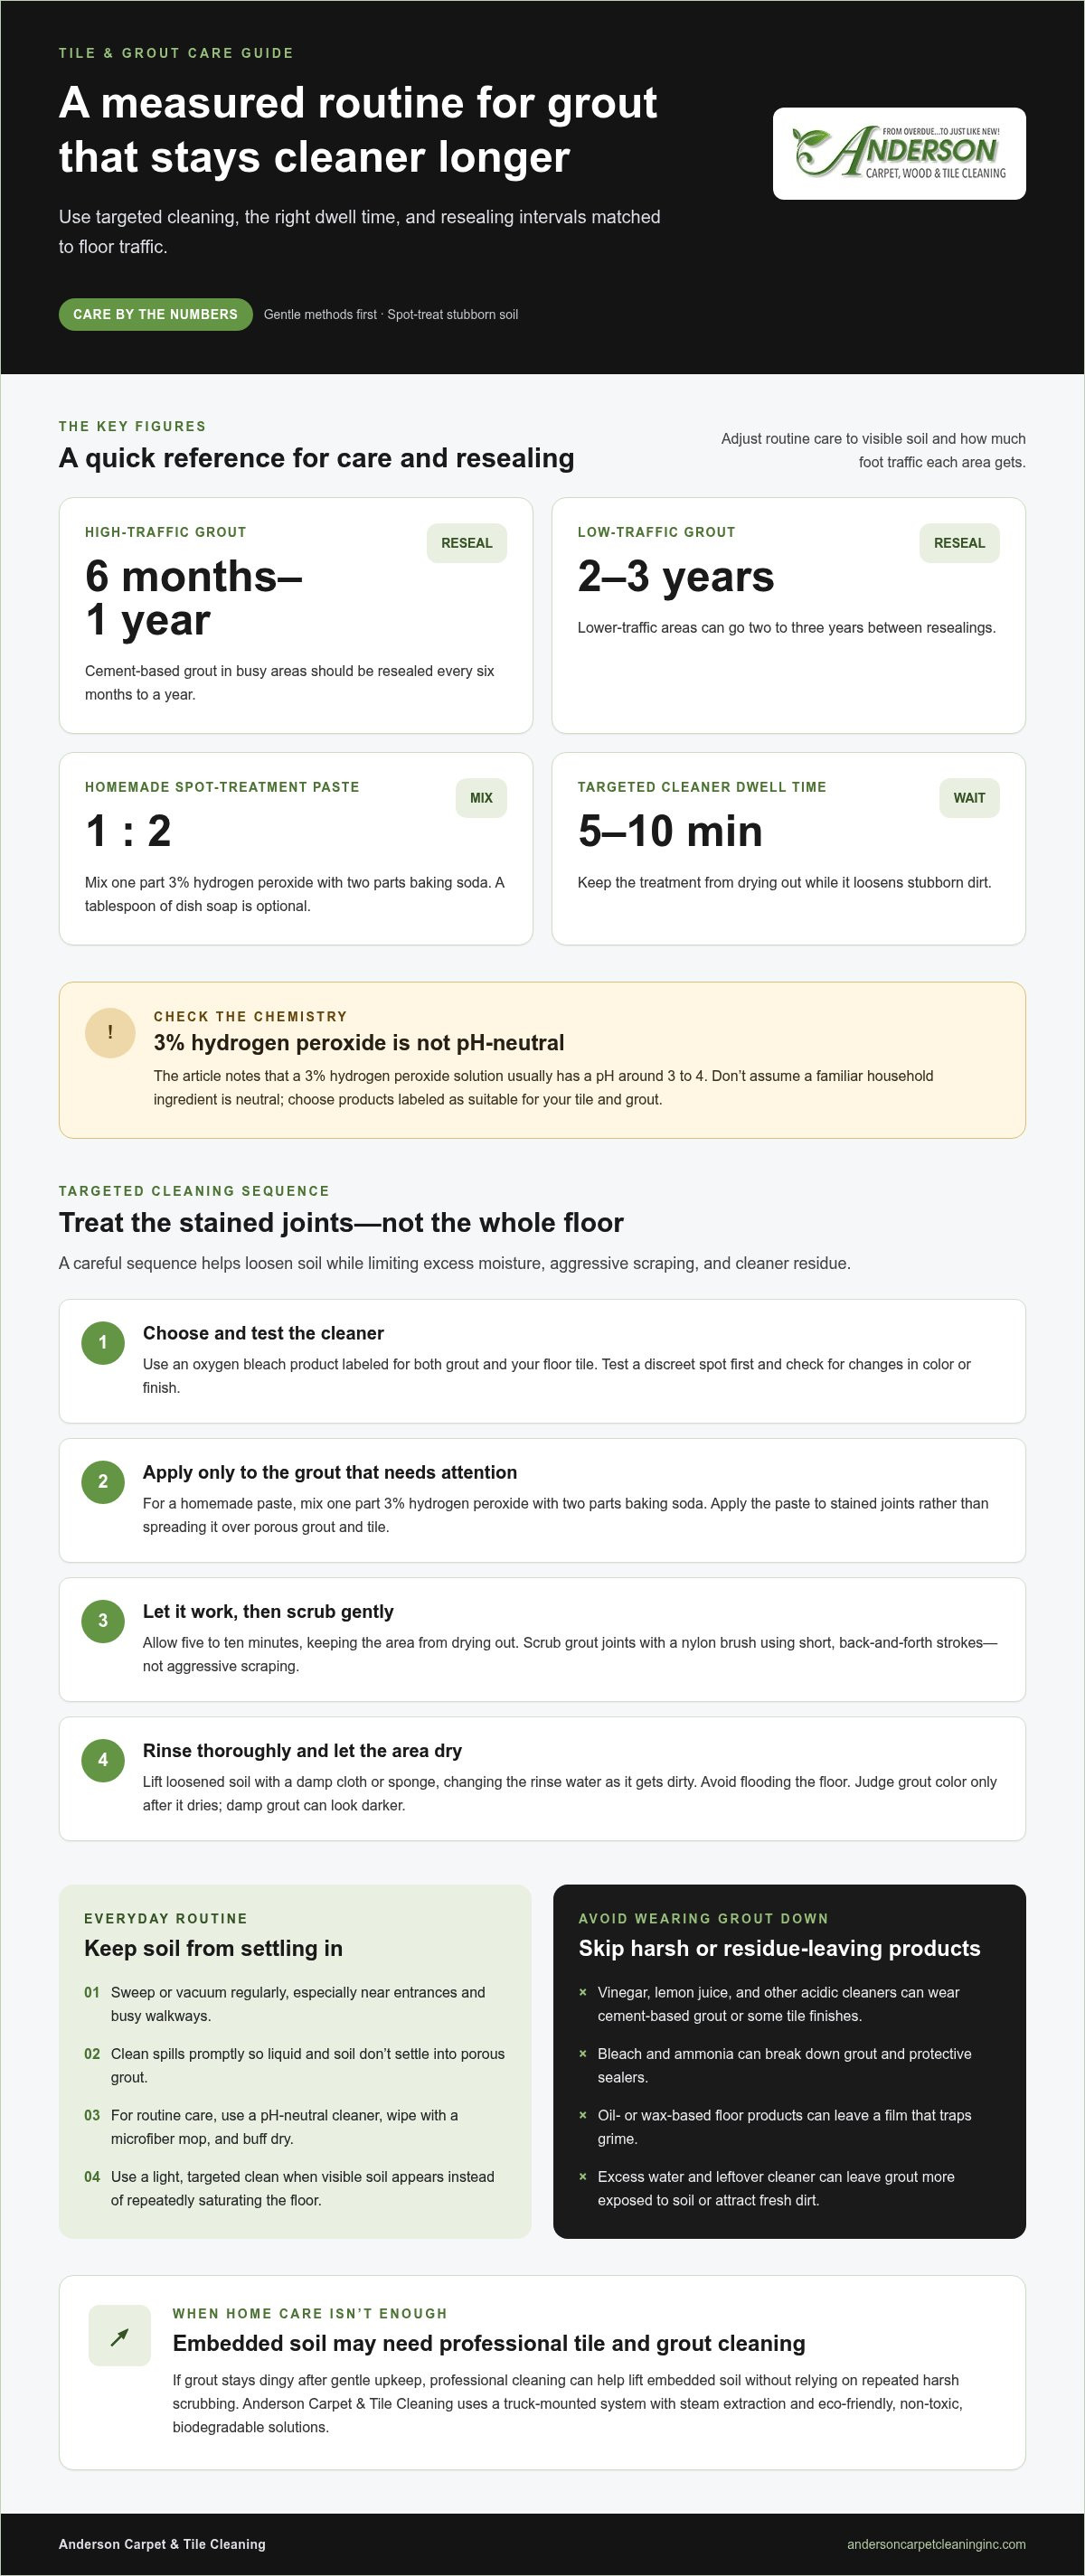
- Use an alkaline cleaner rather than an acid-based product when grout needs a stronger clean. Rinse thoroughly, since leftover cleaner can attract dirt, and avoid soaking the floor. A 3% hydrogen peroxide solution usually has a pH around 3 to 4, so don’t assume that a familiar household ingredient is pH-neutral. For a chemical-free method, steam can loosen soil without harsh cleaners.
Oxygenated cleaners and oxygen bleach
- Choose an oxygen bleach product labeled for both grout and your floor tile. It can help restore grout’s original color and appearance, especially when dirt has dulled the joints. Before treating the whole floor, test a discreet spot and check for changes in color or finish.
- For a homemade paste, mix one part 3% hydrogen peroxide with two parts baking soda. Stir until the mixture holds its shape on a vertical grout line. You can add a tablespoon of dish soap for extra cleaning power. Apply the paste only to the stained joints, rather than spreading it over porous grout and tile.
- Let the cleaner sit on the grout for five to ten minutes to loosen stubborn dirt. Keep the area from drying out, then scrub the joints with a nylon brush using short, back-and-forth strokes. This targeted approach helps remove grime without aggressive scraping.
- Rinse the grout with warm water and lift away loosened soil before it settles back into the pores. Use a damp cloth or sponge, changing the rinse water as it gets dirty. Don’t flood the floor, since excess moisture can affect porous grout.
- Let the area dry before judging its color, since damp grout can look darker. Follow the cleaner label if another application is needed; don’t increase its strength or dwell time. To keep grout clean longer, rinse thoroughly after treatment so cleaner residue doesn’t remain in the joints. Use this as a spot treatment within a careful routine, rather than repeatedly soaking the floor. That distinction matters in busy rooms.
How often should you clean grout to keep it clean longer
- Remove loose soil before it gets pressed into grout pores. Sweep or vacuum regularly, especially near entrances and along busy walkways. Shoes can carry grit and oils indoors, so entrance mats and traffic patterns can help you identify areas that need more frequent care.
- Clean spills as soon as they happen. Liquid left on porous grout can carry soil into the joints, while dried spills may take more scrubbing to remove. In kitchens, check around sinks and cooking areas; in bathrooms, inspect damp corners and grout lines after use.
- Let the floor’s appearance guide routine cleaning instead of waiting for every grout line to look dark. A light, targeted clean can address visible soil without repeatedly saturating the whole floor. If a spot remains after gentle cleaning, treat that area rather than using stronger chemicals across all the tiles.
- Plan resealing according to grout type and traffic. Cement-based grout needs occasional resealing. High-traffic grout areas should be resealed every six months to a year, while low-traffic areas can go 2 to 3 years between sealings. Resealing helps reduce staining and makes routine upkeep easier.
- Keep a simple floor-care rhythm: remove loose dirt regularly, clean spills promptly, and assess grout when its color looks uneven after routine care. For embedded soil that home maintenance doesn’t lift, schedule tile and grout cleaning to refresh the floor without relying on repeated harsh scrubbing.
Remove loose dirt regularly and clean spills promptly to keep soil from settling into grout. In bathrooms, inspect damp corners and grout lines after use, and clean targeted areas when visible soil appears.
Anderson Carpet & Tile Cleaning: Residential Carpet Cleaning
Anderson Carpet & Tile Cleaning provides Tile and Grout Cleaning for embedded soil that remains after careful home maintenance. Its truck-mounted system uses steam extraction to clean tile and grout, while eco-friendly, non-toxic, biodegradable solutions are safe for children, pets, and all fabrics. The woman-owned, locally operated business is not a franchise and serves Seattle, Bellevue, Redmond, Woodinville, Medina, and Federal Way. Professional cleaning is a practical next step when routine sweeping and gentle cleaning no longer lift the grime. Residential Carpet Cleaning is also available for carpeted areas.
For help with tile and grout or residential carpet cleaning, contact Anderson Carpet & Tile Cleaning or visit andersoncarpetcleaninginc.com.
Make Your Floor Care Easier to Maintain
A clean floor is easier to enjoy when its care fits naturally into your home routine. To keep grout clean longer, look beyond the next visible stain: consistent maintenance helps you stay ahead of grime and keep your living spaces feeling cared for.
For deeper cleaning support, Anderson Carpet & Tile Cleaning offers Tile and Grout Cleaning, Residential Carpet Cleaning, and Commercial Carpet Cleaning. The woman-owned, locally operated business is not a franchise and serves Seattle, Bellevue, Redmond, Woodinville, Medina, and Federal Way. Request a free, no-obligation estimate directly from owner Lisa Shultz to discuss your cleaning needs.
Take the next step at your pace. Contact Anderson Carpet & Tile Cleaning to discuss cleaning for your floors, and keep building a routine that feels manageable.
Frequently Asked Questions
How do I clean off the “white stuff” on my grout?
White, powdery deposits may be efflorescence, which can return if moisture is entering the tile system. First, wipe a small area with a dry cloth to see whether the residue lifts. Avoid vinegar and other acids, which can erode cement-based grout. If the deposits return, surface cleaning alone won’t address the moisture feeding them.
What Are Some Proven Techniques for Restoring Grout’s Original Color and Cleanliness?
Start by identifying whether the discoloration is soil, a stain, or a lasting change in grout color. A topical grout color seal can create a more uniform appearance while forming a barrier over the grout. For difficult stains, steam may lift marks that resist conventional cleaners. Epoxy grout is highly stain-resistant, so persistent discoloration may have another cause.
Does sealing grout prevent stains and how often should grout be resealed?
Sealing helps resist stains, but it doesn’t make every grout joint maintenance-free. Penetrating sealers repel water and water-based stains, while topical sealers form a surface coating that wears over time. Use the resealing intervals discussed above as a guide, taking grout type and foot traffic into account. Cement-based grout needs occasional resealing; epoxy grout is more stain-resistant.
Should you use epoxy grout instead of cement grout for easier cleaning
Epoxy grout is more stain-resistant than cement-based grout, so persistent discoloration may be less of a concern. Cement-based grout needs occasional resealing. For homeowners planning a renovation or new installation, guides from specialists like Express Tiling Limited highlight how selecting the right tiles and grout system early on simplifies ongoing maintenance.
How to prevent mold and mildew on bathroom grout
Provide adequate ventilation in humid areas, clean spills promptly, and don’t let excess water sit in grout lines. Inspect damp bathroom corners and grout after use. In high-humidity commercial settings such as fitness centers and locker rooms, professional services like That's Cleaning focus on deep cleaning and moisture extraction to keep tiled areas hygienic and mold-free.


